On this page we explain how you upload and manage your product data with the Product Manager so that it becomes available to your buyers via the Trading Partner Network.
You can use the Onetrail template, as explained below, or your own product data file.

Step 1: Login to the Product Manager
Go to the My Onetrail environment www.apps.onetrail.net and login. Your username and password will be provided by Onetrail by email.
Problems logging in? See the Q&A ??? for all answers (link page)
Step 2: Fill out the Onetrail template
Go to the tab Products, you are now in the Product Manager.
Start by downloading the Onetrail template. You do this by hitting the 'Download current overview' button.
The Onetrail template can be found in your downloads folder.
Open this document in Excel.
Onetrail template guidelines
All product data you want to make available to your customers must be presented in this Onetrail template.
Each column comes with specific restriction and requirements for the data being added.
An overview of all columns can be found in the product data file guidelines.

Go to Product Manager
Step 3: Upload your file
When you are finished filling out your file you are ready for the upload.
- Go to the Product Manager home page. Choose 'upload products'
- Choose your file in the finder or drag your document to the drop box.
Your product file is now uploaded.
Step 4: Matching records
Your data is matched with the records in our Product Data Store. Data that is not recognized must be matched manually.
If this is the case for your product file, a message will appear on your screen together with an overview in columns of all unmatched records.
Unmatched records a may appear in the columns:
- Brands;
- Classifications;
- VAT Codes;
- UOM.
You use the Product Manager's matching tool to match your unmatched records. This way you indicate the correct match for all unmatched records.
You do this by typing on the line, suggestions will appear.
These suggestions are the correct brands, classifications, notations of the VAT and Unit Of Measure recognized by Trading Partner Network.
Once you have found the correct description, confirm it by clicking the plus sign.
The matched records will end up in the 'matched' column below the 'unmatched' column. Work through the entire list until there are no unmatched records left.
Request a new brand or classification
If the brand or classification you need is not available, you can request it.
You do this by filling in and sending your request at the bottom of the matching column. The product data management department of Onetrail will contact you by email.
To be able to continue working while you are waiting for a new brand or classification, we recommend that you leave this record open.
The unmatched products are not yet processed and are not yet available to your buyers.
Once your request is approved, the brand or classification is available for matching. You do this in the same way as we explained earlier in this video.
Finish
When you've matched all the records, or left them open for a later match, you're done with this part.
Now click on the 'Next button' at the top right.
Step 5: Overview of all available products and customize products
In the product table you will now see an overview of all the products that you have made available to your customers.
This display defaults to 10 records, you can adjust this setting at the top right. Use the arrows at the bottom to navigate through the overview.
You can also:
- Sort
- Filter
- Choose which columns you want to be displayed
- And choose fields
Download current overview
With the 'Download current overview' function you can download an up-to-date overview in Excel format of all product data that you have made available to your buyers via the Product Manager.
Adjustments
If you want to make an adjustment, you can do so with a new product file upload.
For products that are no longer supplied, for example due to end of life (EOL), you remove the product line from the product file.
The system automatically sets the missing product to delite. This product will then no longer be forwarded to your buyers.
My Onetrail dashboard
The next time you login to My Onetrail environment, you find in the top right corner an overview of the status of your products and orders.
The 'Check products' and 'Check orders' button provides a direct link to your unmatched records and orders in progress.
The my Onetrail dashboard provides news and notifications to keep you informed on our maintenance and incident status and the latest product news.
Update, monitor and maintain your connection
Provide a daily update
Dustin demands up to date product data from all suppliers. To comply with this, you need to provide a daily update of your product data file to our server location.
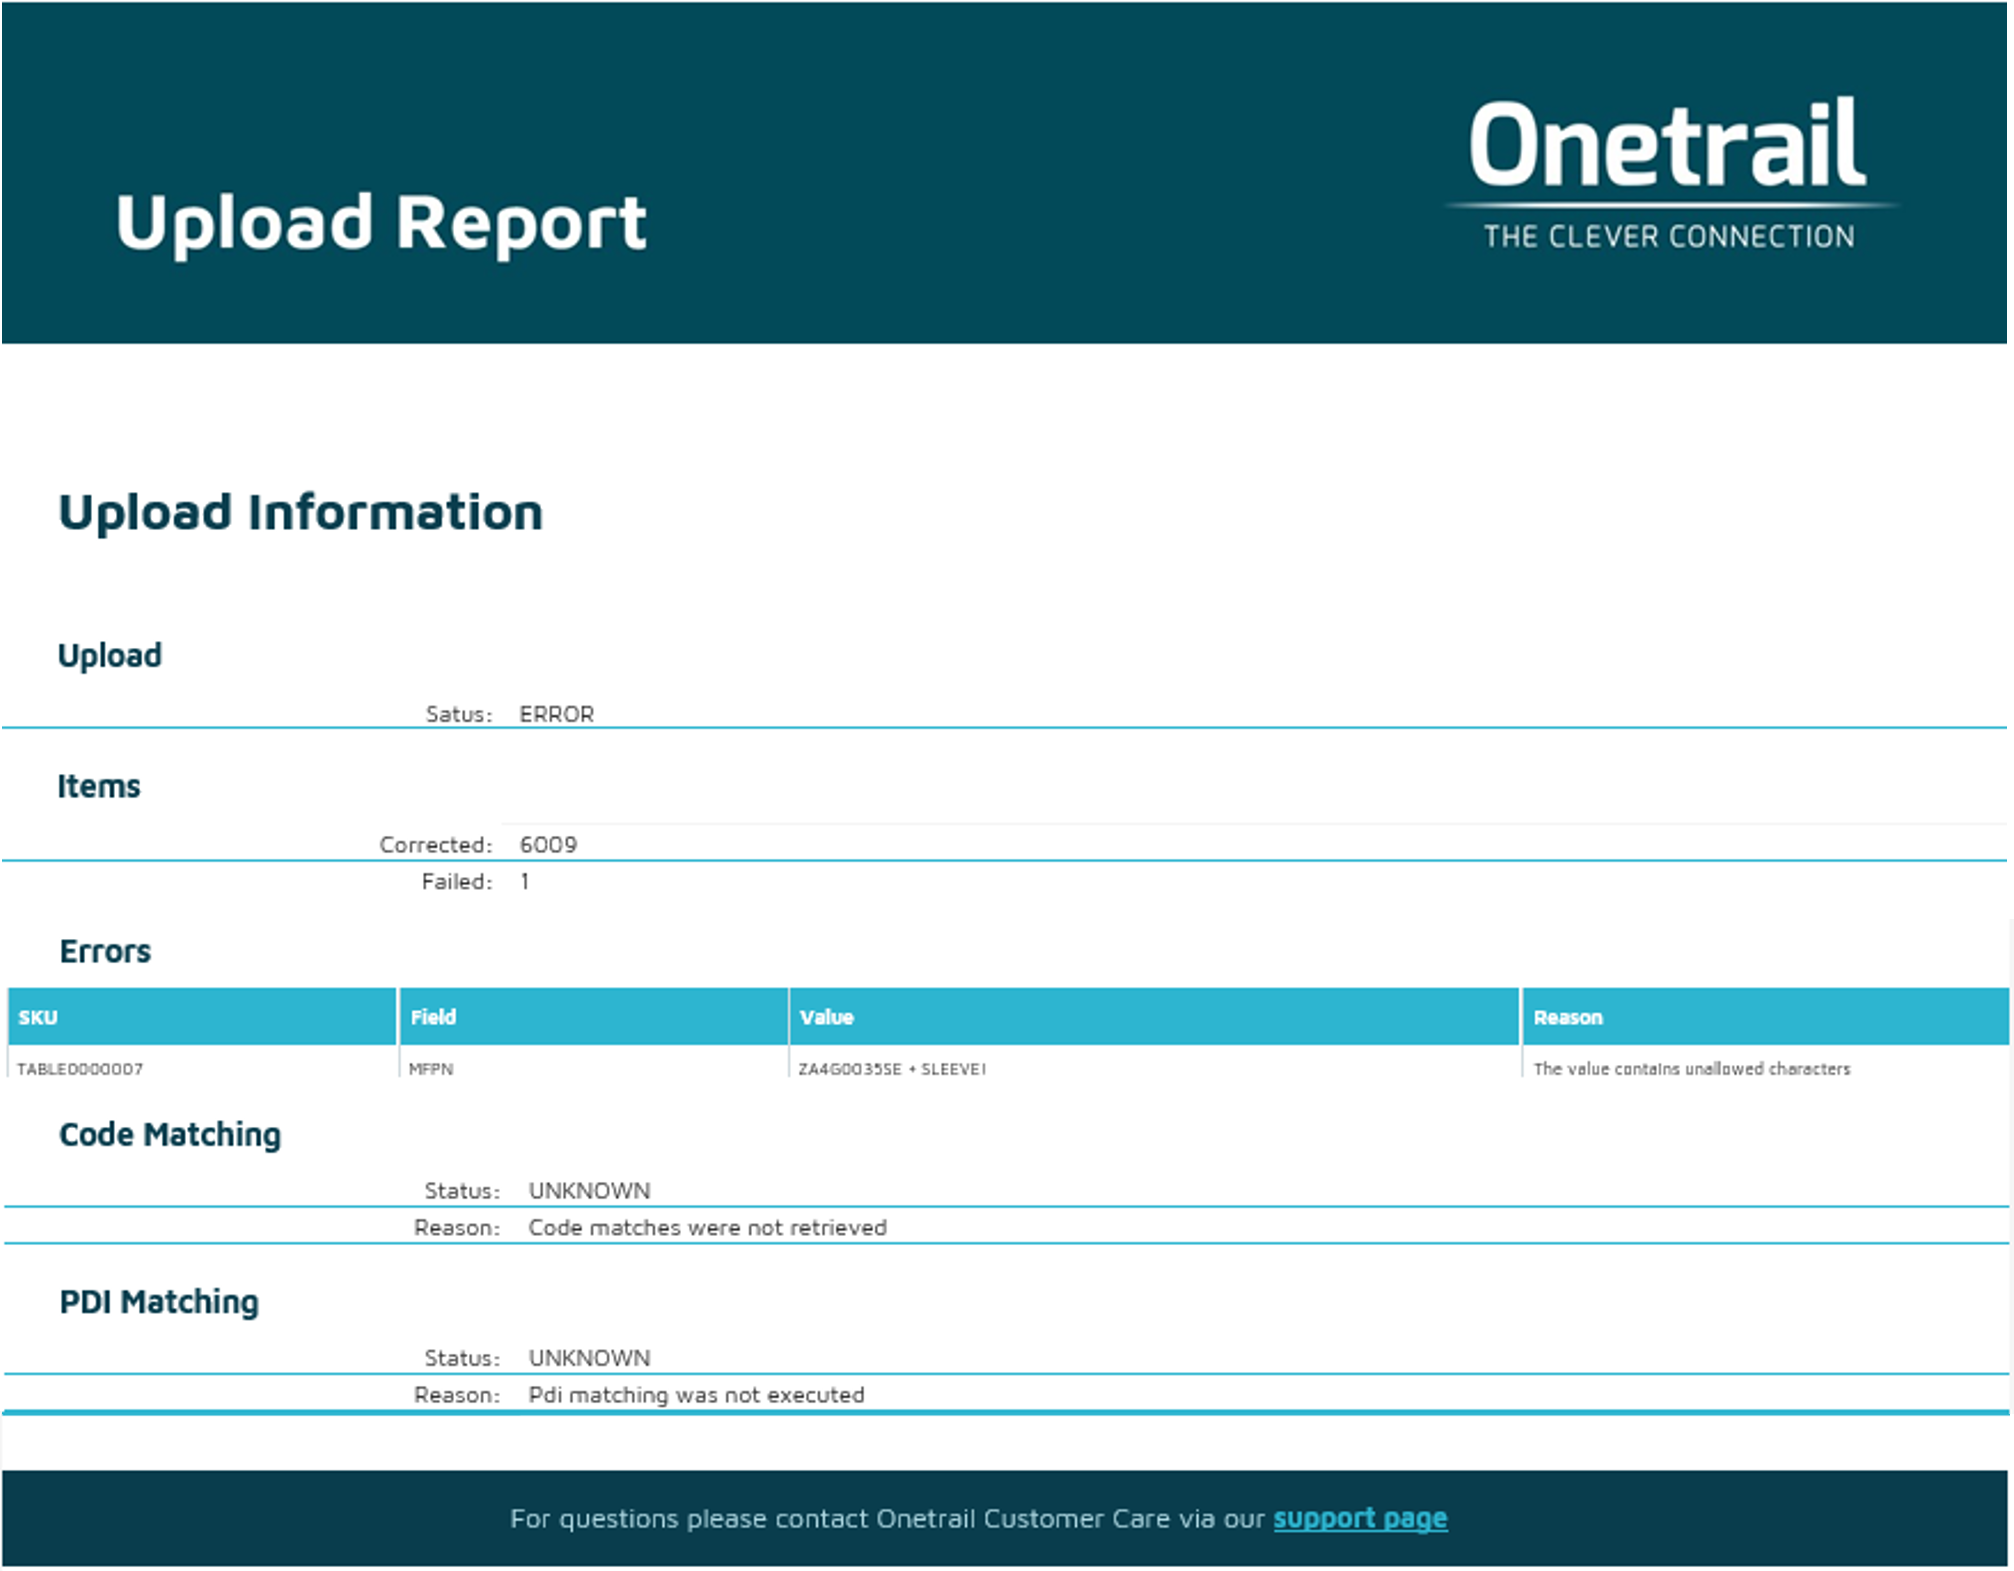
Upload Report
Onetrail monitors your product data flow and will let you know with an Upload Report when any irregularities occur.
This alert is sent by email to your technical contact person.
Support
If you have any questions on your Dustin connection please contact Onetrail Customer Care via our support page, we are happy to help you.
If you do not have a Servicedesk account yet you can request one easily via an email to our support address support@onetrail.com
...